Copyright © 2020 Mike Burns
Joinery and General Works
In this section I talk about some of the other jobs I have done which don't fall into one of the specific categories above.Joinery aka carpentry is concerned with the use of wood as a construction material. Quite a bit of wood has gone into our renovations, and while a lot of this generally is covered up and not directly on display like the kitchen units or worktops, that does not mean that it doesn't still have to be done fairly accurately. Chipped edges are usually not an issue, but if things are not plumb (i.e. leaning to one side rather than perfectly vertical), or do not line up or meet at the right angle, the error will tend to propagate and can only be hidden to a certain extent by whatever goes on top. Put another way, if the foundation you're building on is poor then you can't really expect the finished result to be any good either.
Stud Walls
A stud wall, as opposed to a brick or block wall, consists of a wooden frame, which is then covered with plasterboard on either side and
plastered (or tiled). It's a popular way of building internal walls because they are cheaper, quicker and lighter (which affects what needs to be
underneath in order to support them). A stud wall should look indistinguishable from a brick/block wall, but the giveaway comes when you knock on
it. Stud walls are hollow, although you would usually fill them with rockwool or similar to provide both thermal and acoustic insulation.
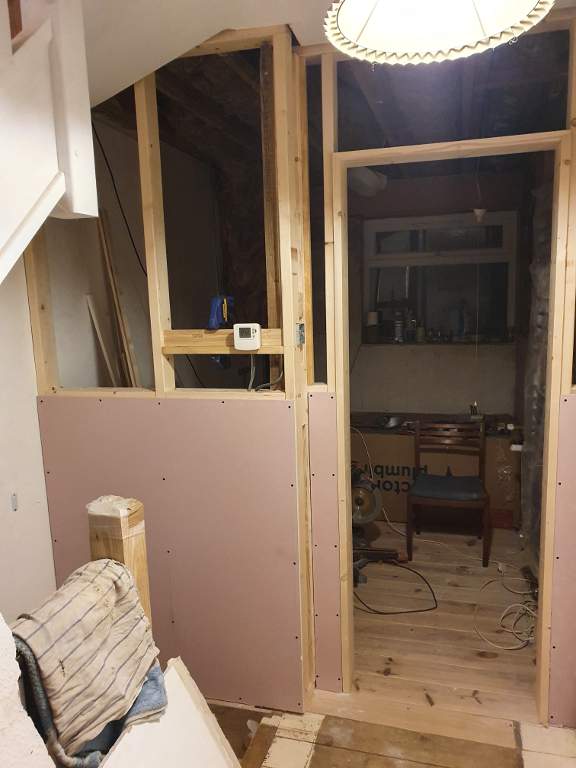
I built one such wall behind the kitchen sink isthmus, but the biggest task of this type was the walls to divide the former kitchen/diner into a
bedroom, an ensuite shower room and a separate cloakroom to be accessed from the first floor landing.
The studwork will generally consist of a floor and ceiling plate with verticals between them at centres anywhere between 400mm and 600mm. The closer the verticals, the more of them you obviously need and hence the greater the material cost, but the more solid the wall will be. In between the verticals you fit horizontal "noggins". Again in general the more the better, but as a minimum you need to think about the size of your plasterboard sheets and where the joins will be. Joins need to coincide with a vertical or noggin as they need the structural strength. If not, one knock against the wall and it will be dented in. Additionally at this stage you have to think about where anything heavy like a sink or radiator will be mounted. You can't just fix these to plasterboard, it will be nowehere near strong enough, so if they don't naturally coincide with your noggins and verticals then you need to add further timber to your structure in the right places.
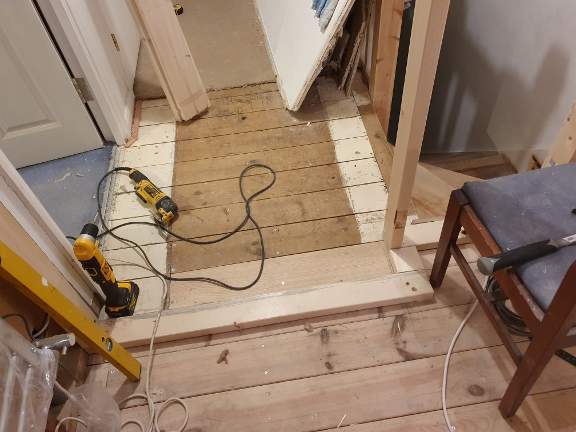
This is the floor plate and first
vertical for the new (repositioned) family bathroom front wall. The floor plate is initially installed across the bottom of the door aperture, but once the
rest of the wall is installed the door section is cut and removed. This makes it easier to ensure that everything lines up nicely.
One pitfall with stud walls can be for them to be too flimsy, meaning they can shake and rattle when for example doors are closed. To make sure this
isn't the case, I choose adequately substantial timber, and rather than just fixing it together with a nail gun as is the preferred method of many builders, I
use long screws in pre-drilled holes AND wood glue. This takes longer but the resulting structures are rock solid.
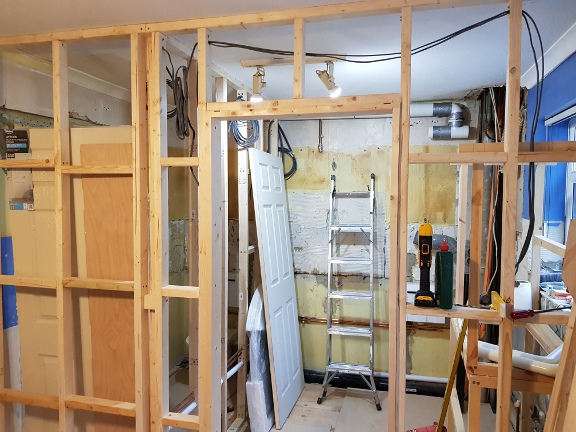
Here you see the same family bathroom front wall with the studwork complete, the door frame fitted and the lower half of the plasterboard affixed. The section
of the floor plate originally across the door opening has been cut and removed. Note the horizontal noggins are at exactly the right height to coincide with
the join. Note also the extra noggin added for the thermostat to be fixed to.
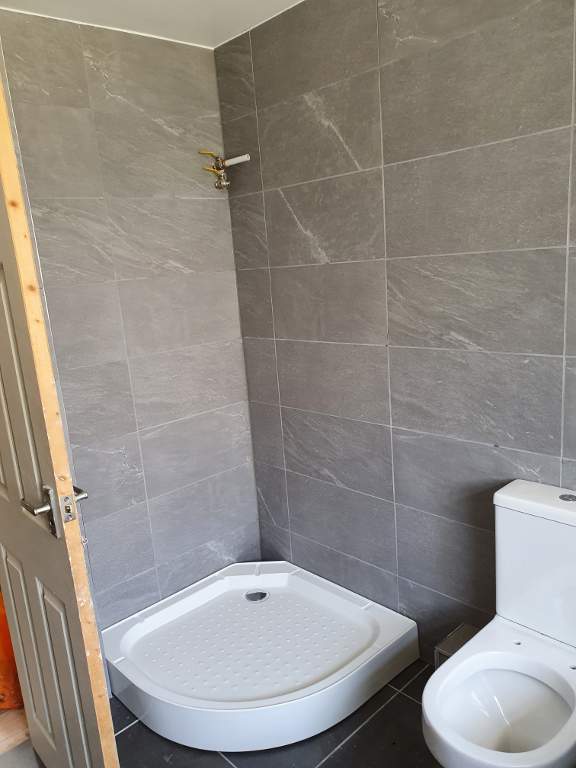
Once all the plasterboard was affixed to this side, and the shower pipes
routed inside, the cavity would be filled with rockwool insulation and then plasterboard affixed to the other side. This side would be plastered, the other
side would be tiled. Given that it is already perfectly flat and smooth, there is no benefit in plastering onto the plasterboard before tiling.
Boxing In
An extension of the same sort of skill as studwork, but a usually bit less uniform and hence more interesting/challenging, is the boxing in of pipes or
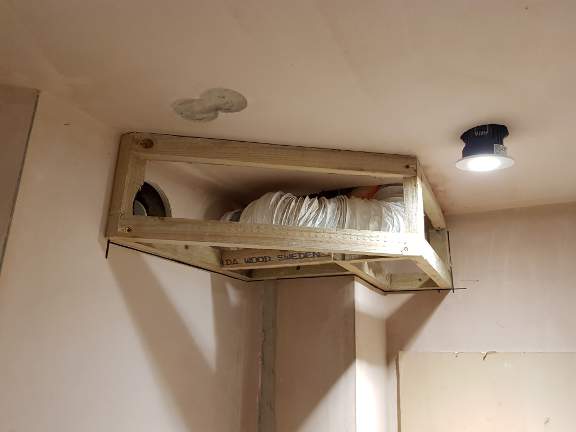
other infrastructure that needs to be hidden. I did a lot of this, at varying scales. In the Family Room, killing two birds with one stone, I boxed in
the extractor vent pipe from the cloakroom and the (orange) sprinkler pipe which had to go below ceiling level to get under the steel beam that replaced the
ground floor rear wall of the house.
I eventually covered this in plasterboard and then plastered it.
Under Basins
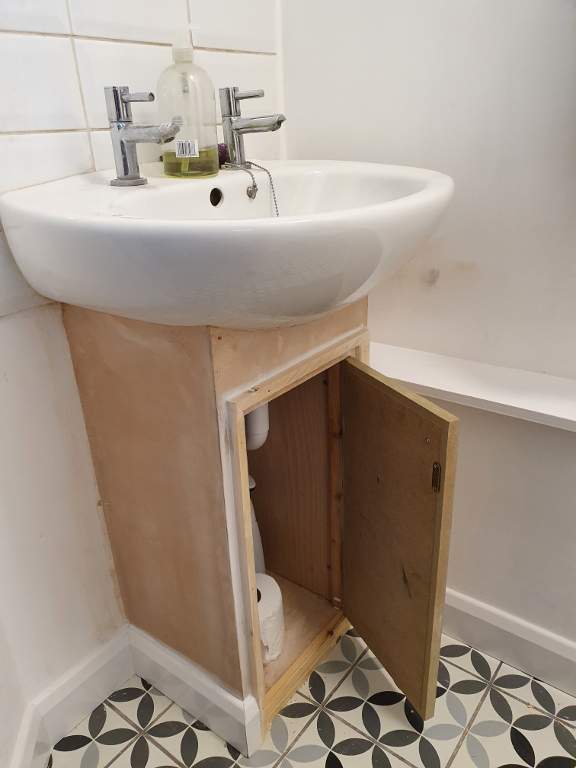
Handbasins will usually be fixed firmly to the wall and it would be perfectly possible just to leave it at that, with the trap and hot/cold pipes remaining exposed underneath. Another alternative would be to slot in a porcelain pedestal, but my favoured option is to box it all in. Being in a corner, the space under the basin in the first floor cloakroom was not worth trying to utilise so I just boxed that in completely, but in the ground floor cloakroom I managed to make a little cupboard to store toilet rolls, bleach etc. I was particularly pleased with this effort because I made it almost entirely from offcuts and leftovers. The miniature architrave around the door was handmade using a bench saw then a router. Construction was a wooden frame, lined on the inside with plywood, then plasterboard and a skim of plaster on the outside. The only thing I had to buy specially was the little hinges. It looked even better once it was painted.
Tiling - Walls
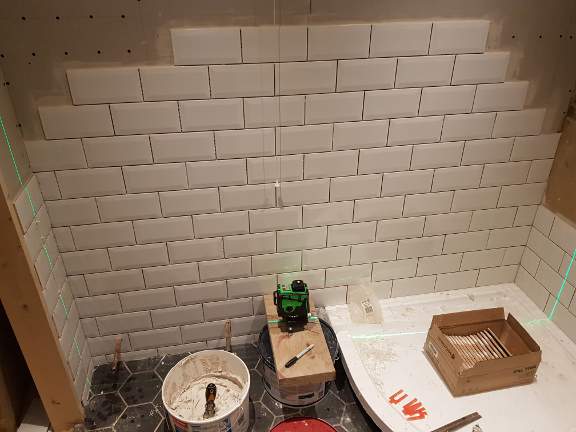
If you are tiling all the way round a room, one thing you need to take particular care of is that all the tiles are placed perfectly horizontal and aligned exactly. If there is any error then you will find when you get back to your starting point that the rows do not line up, which would look absolutely terrible. Doubtless in the old days there were clever schemes involving spirit levels and pieces of string to help avoid this, but the modern solution is to use a laser line. This will cast a perfectly horizontal and/or vertical line 360 degrees round a room, which you then just have to make sure you follow. Vertical alignment of the grout lines is slightly less critical than the horizontal alignment, but still important for a professional quality finish.
In the family bathroom I chose much larger tiles than the metro tiles used in the First Floor Ensuite and kitchen. These were a choice determined by the fact that I was
given them for free, and I was very grateful indeed for that, but it does take longer to cover an area with them.
I also chose porcelain tiles over ceramic. These
are generally considered better quality, and are thicker, harder and more durable. The downside is that they are more difficult to cut - you will need fairly serious and
professional kit to do so.
The basic process of tiling, whatever tiles you use, is to cover an area of wall with tile adhesive and then run over it firmly with
a notched trowel to make it a uniform thickness. I then prefer to "back butter" the tiles themselves with a very thin scraping of adhesive as well, as this leads to
better adhesion. Plastic spacers are inserted between the tiles to ensure that they all spaced at exactly the same distance and you end up with neat and uniform grout
lines (grout is the stuff you insert later between the tiles to fill the gaps). Once the adhesive has set hard, you can apply your grout using a specially designed
rubber "float", before wiping away the excess. External angles should be fitted with metal or plastic tile trims - these make the edges look neater as well as protecting
them from knocks. Internal angles should not be grouted but instead sealed with silicone - this is flexible and will not crack like grout if the two abutting surfaces
should move slightly relative to each other. With stud walls in particular, given that wood expands and contracts quite a bit with temperature, this is a real possibility.